
Model Message Board
Collected: C. Roldan's Box Stock [w/foil]57 Chevy Street Machine Pts 1-7
Posted By: Art Fleischmann
Date:
Wednesday, 27 February 2002, at 10:05 a.m.
I did this with the earlier posts as a way to keep the whole thing together.
Just cut & paste - no refinements.
Sorry, but I have not yet figured out why the text gets more narrow as you go down.
I know it makes it harder to read.There is probably some "centering"
HTML command in the code.Any help?
To start with-
this is the kit being used:
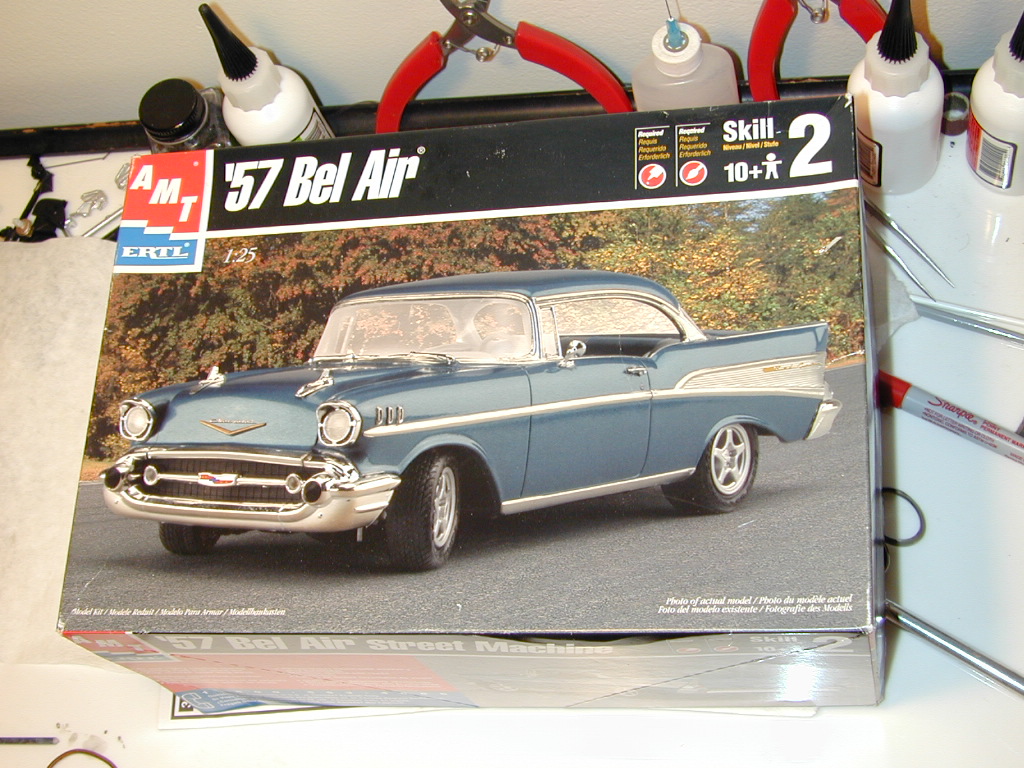
Collected: C. Roldan's Box Stock [w/foil]57 Chevy Street Machine Pts 1-6
Posted By: Art Fleischmann
Date: Wednesday, 2 January 2002, at 3:15 p.m.
View Thread | Post Response | Return to Index | Read Prev Msg | Read Next Msg As long as I've figured out how to do this.
[And remember how...]
This will work as long as the pic links are OK.
Another great project series Christopher.
Certainly not "just another red 57 Chevy".
Art
************************************
Model Message Board
TAMIYA SPRAY PAINTS KICK MAJOR BUTT!!! Latest model car project.......*pics*
Posted By: Christopher Roldan <mailto:chris@stonehillnews.com?subject=TAMIYA SPRAY PAINTS KICK MAJOR BUTT!!! Latest model car project.......*pics*>
Date: Sunday, 4 November 2001, at 2:00 a.m.
This is the first time I tried there spray paints and I am TOTALLY BLOWN AWAY! IMHO it puts the "other" model spray paints to shame. this stuff dried to a ROCK HARD finish within a few hours! no, not a few days, or few weeks, or a few months....a few years? no way ho-sey! we're talking a few HOURS! I was doing backflips in disbelief!
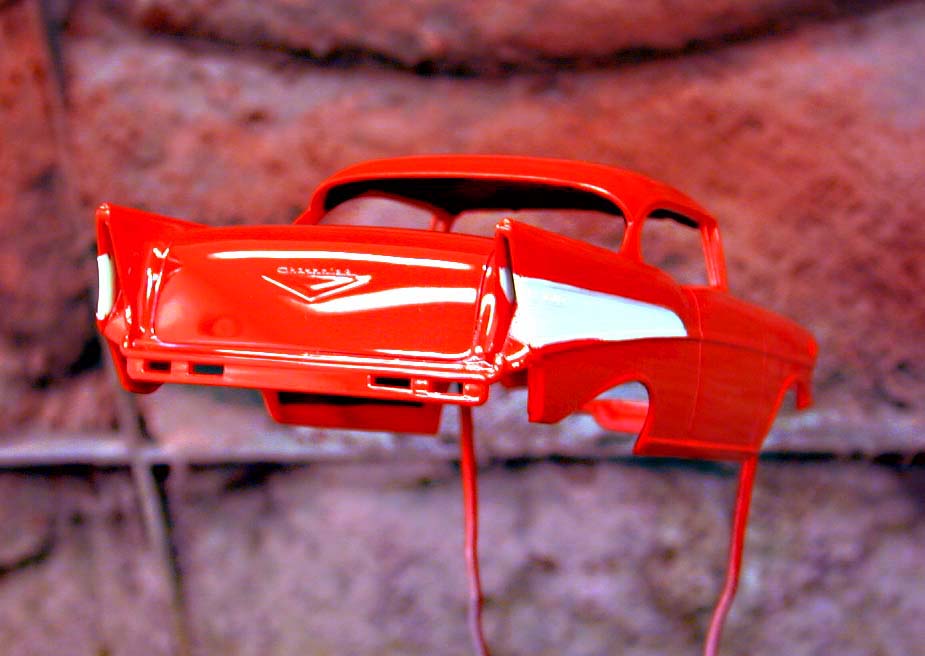
Check out that gloss! that's straight from the can on the plastic, no priming, clearcoat or polishing.........and most Important, no friggin ORANGE PEEL!
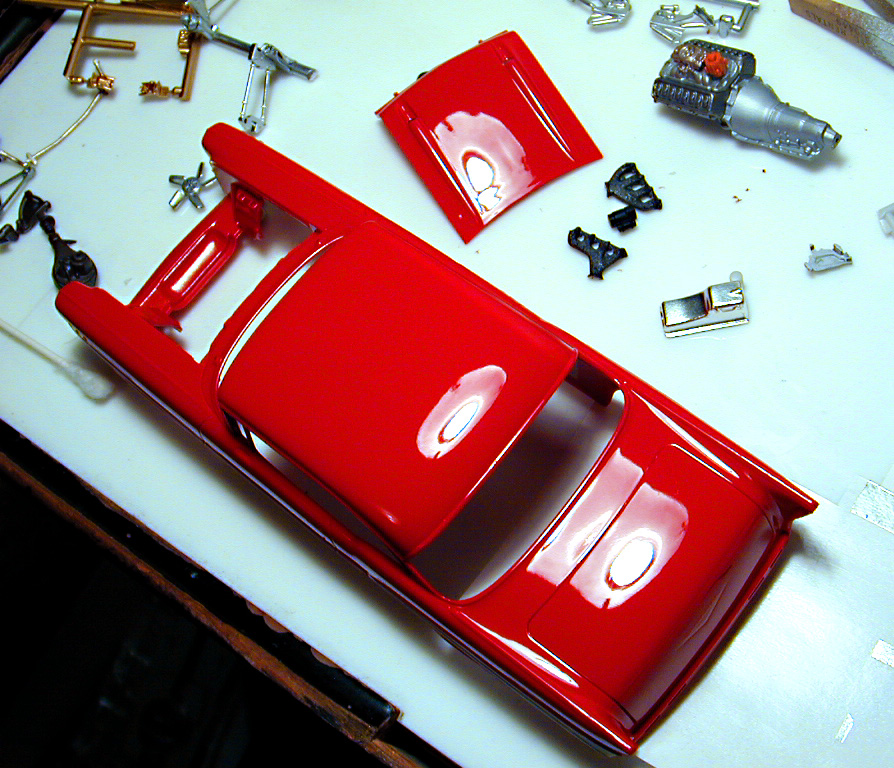
This paint has Interesting characteristics. I laid all five coats heavy to the point where I buried lots of the detail and even lost the molded in "Chevrolet" scripts on the hood and trunk and to my surprise the paint shrank back quickly and better than any other brand of paint I've used (even the automotive brands) to reveal all the sharp crisp detail on this excellent kit....amazing stuff is all I can say!
Okay, so they don't offer a million colors but from here on I'm sold on TAMIYA model spray paints! just like there model kit's....they are excellent and I highly recommend them to those who don't want to bother with priming, automotive lacquers and polishing. for straight out of the can finish, it can't be beat! now if you'll excuse me I'm gonna' go grab a coldie in celebration of my discovery!
*****************
'57 Chevy Street Machine progress....................*pics*
Posted By: Christopher Roldan <mailto:chris@stonehillnews.com?subject='57 Chevy Street Machine progress....................*pics*>
Date: Monday, 5 November 2001, at 2:22 a.m.
Finally got the engine done today now I'm off to the chassis. fortunately I'm entering this in the "Box Stock" class so building is going pretty fast. every single part to this kit I pre-painted, now All I have to do is glue it all together....
Box Stock is actually a fun class and I'm beginning to like it more and more. it challenges you to really focus on "bringing out" the stock parts instead of depending on custom scratch building, kitbashing or after market parts.
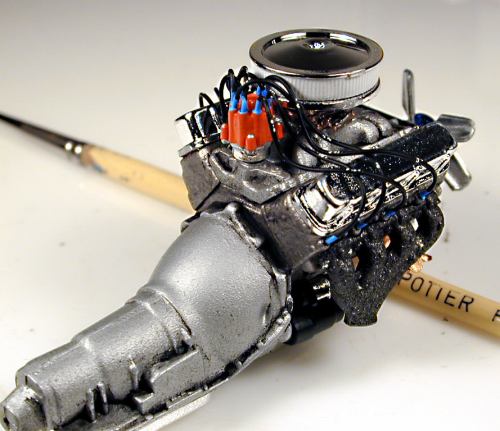
I spray painted each individual part of the engine and chassis different shades of chrome silver, dull aluminum, stainless steel, bright gold, copper, bronze and cast steel to "hi-light" the pieces followed by some Bare metal chrome & aluminum foil here and there....
The oil filter looked a little too bare so I didn't hesitate to grab some sharpie markers and "tagged" it. I decided to give the spark plug wires the same treatment with tiny dabs of white paint to simulate reference marks of some sort.
And now, off to step three!
******************
'57 Chevy Street Machine progress, step three........*pics*
Posted By: Christopher Roldan <mailto:chris@stonehillnews.com?subject='57 Chevy Street Machine progress, step three........*pics*>
Date: Monday, 12 November 2001, at 9:46 p.m.
Well here we are again on good 'ol Tom's message board quenching our styrene fix for news, pics and any sort of Info relating to one of the things we love to do and share.....building model cars. so on that hand, here are some progress pics of my Box Stock '57 Chevy.
I'm trying my best to hi-light the stock detailed parts from this excellent kit by means of foiling the least expected details instead of just painting them.
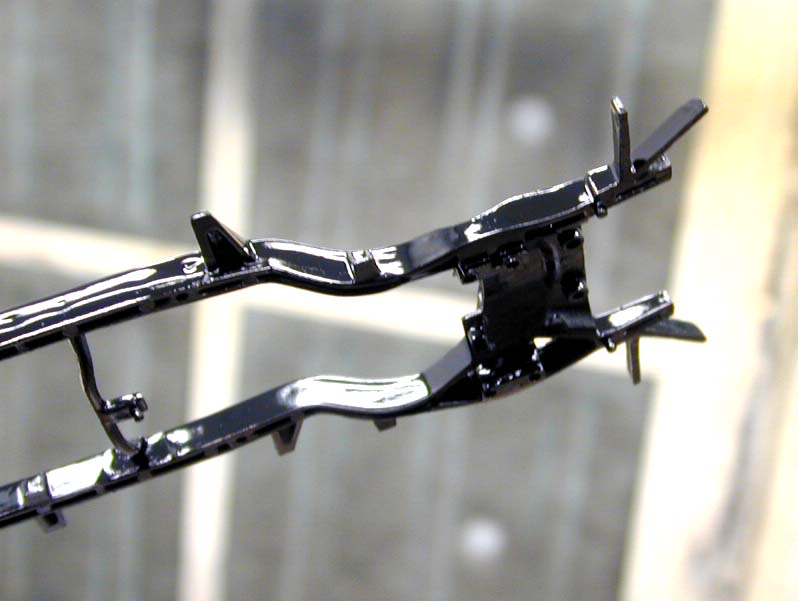
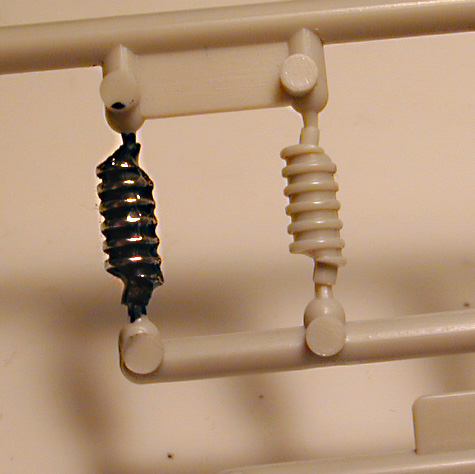
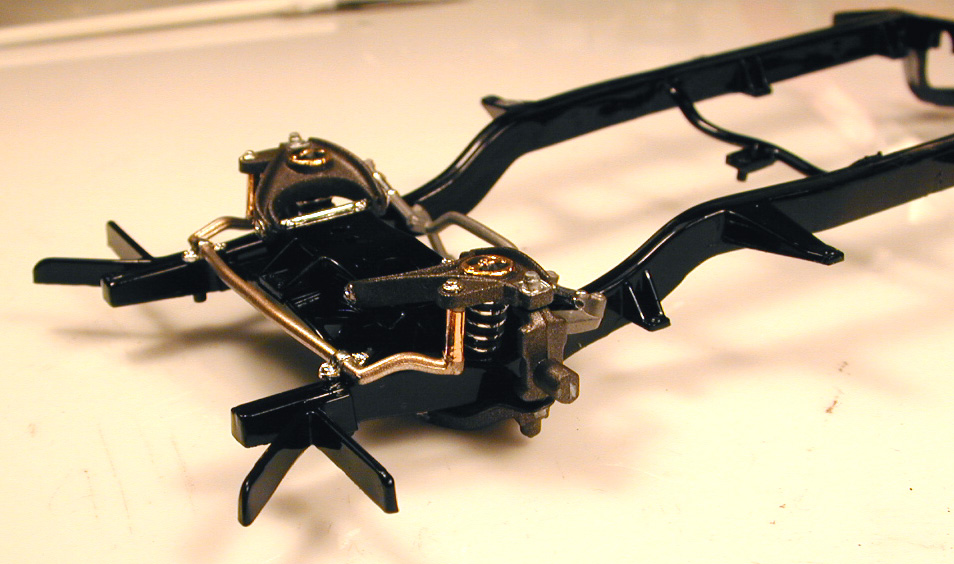
Here I first Chrome Foiled the coil springs followed by some Flat black then wiped off the excess paint with a soft clean rag dampened with thinner.
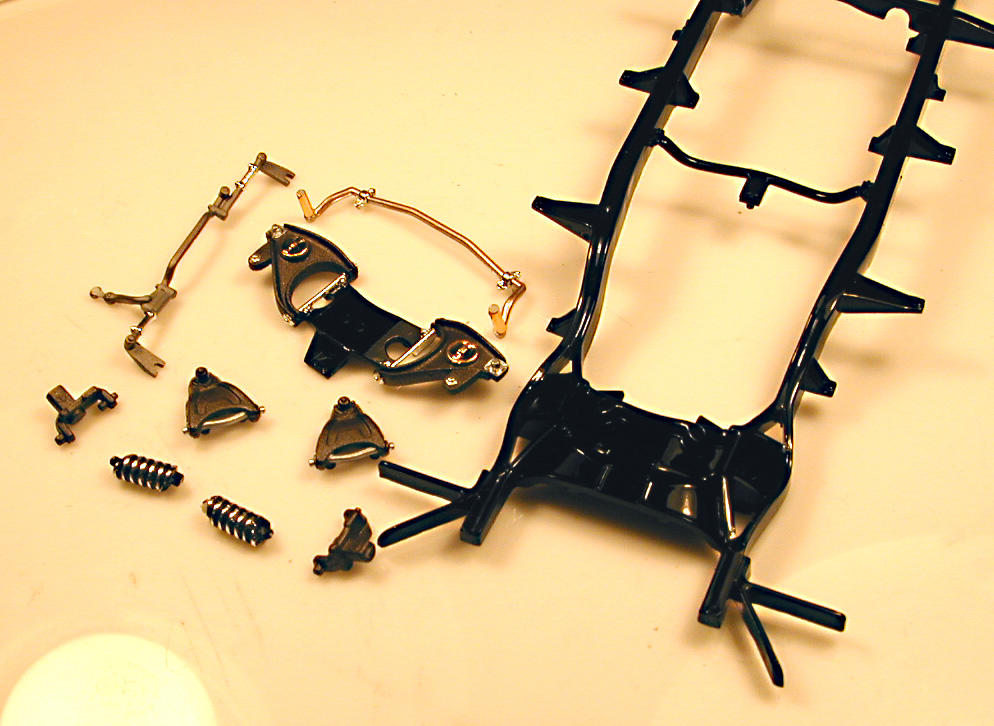
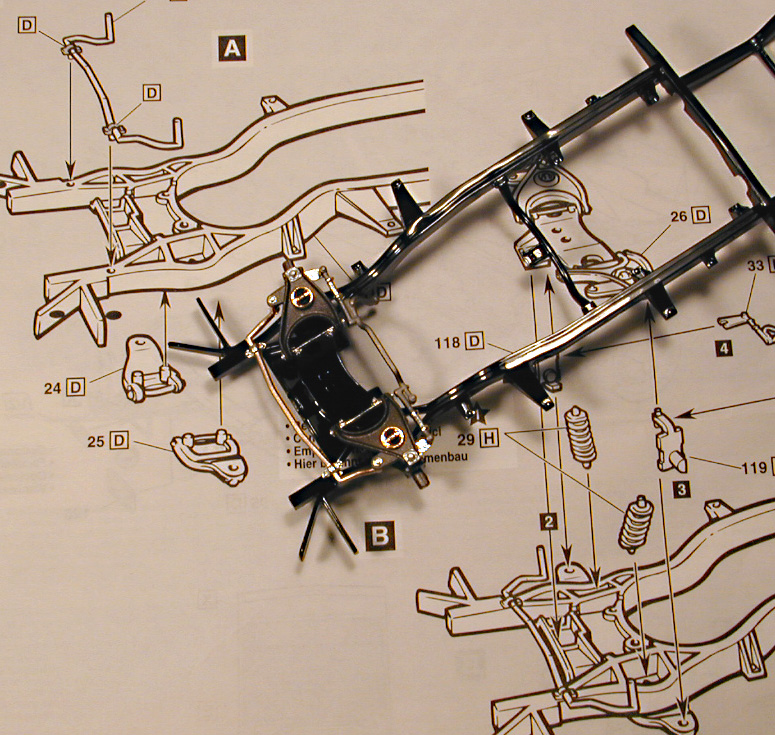
The Lower "A" Frame, Sway Bar and Tie Rod were also treated to some Chrome and Gold foiling prior to assembly.....
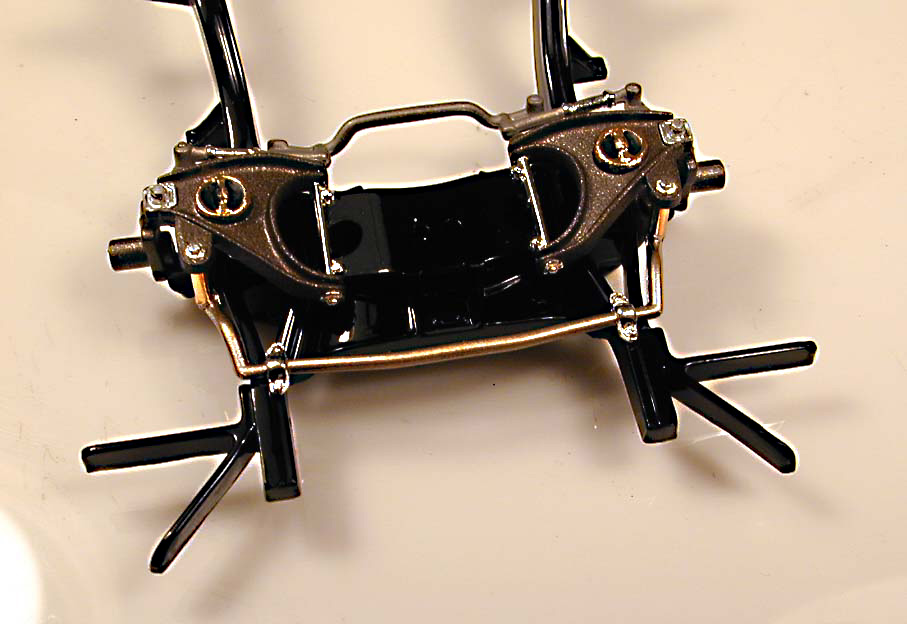
...and now it all comes together....
Now we're off to step four!
*******************
'57 Chevy Street Machine progress. step4......*pics*
Posted By: Christopher Roldan <mailto:chris@stonehillnews.com?subject='57 Chevy Street Machine progress. step4......*pics*>
Date: Saturday, 17 November 2001, at 2:58 p.m.
First off I want to thank you all for the compliments on the last set of pics.
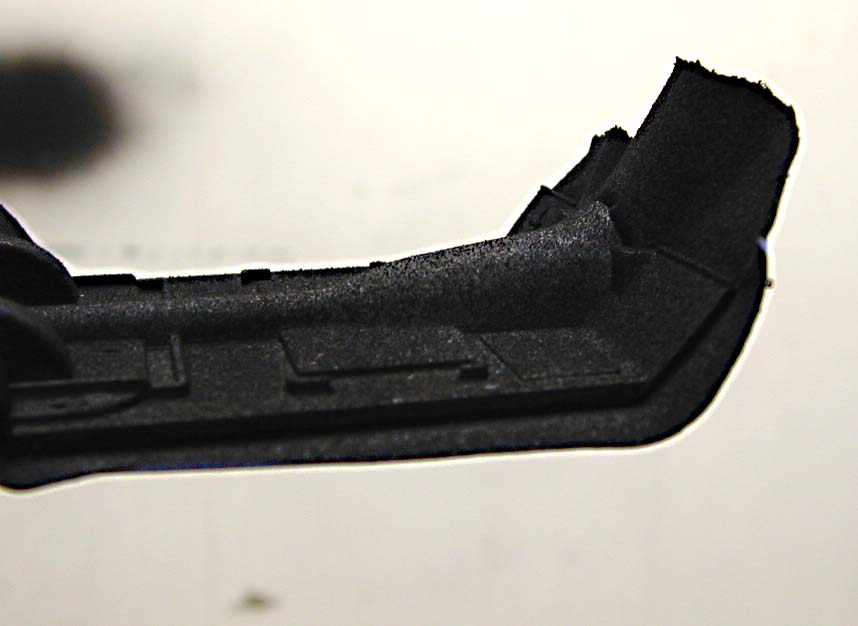
Since most rules for Box Stock don't allow any Flocking, this is what I tried to simulate a "carpet" look...
First I spray painted the molded in Gas Pedal and Floor Mats Krylon Semi Flat Black then masked them. then from exactly two feet back, I misted on about ten coats of Krylon Ultra Flat Black. I know it probably sounds like a lot but that's how many it took before the paint built up to almost look like Flocking instead of paint.
Boy, I just can't seem to leave that Foil alone!
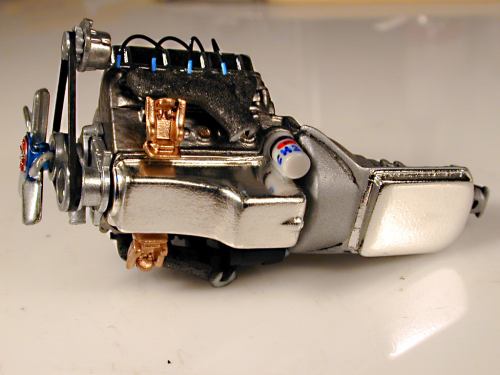
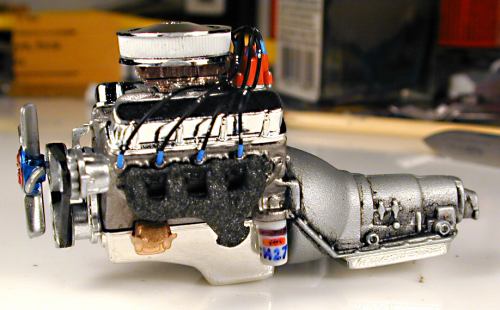
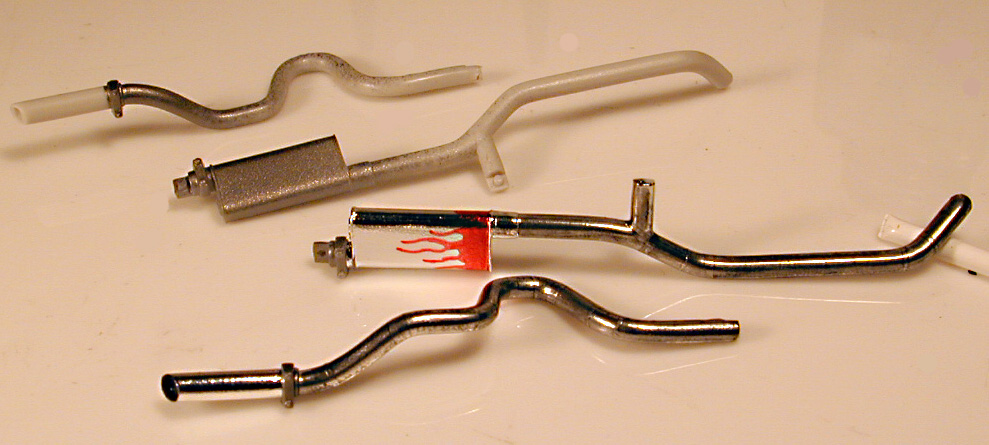
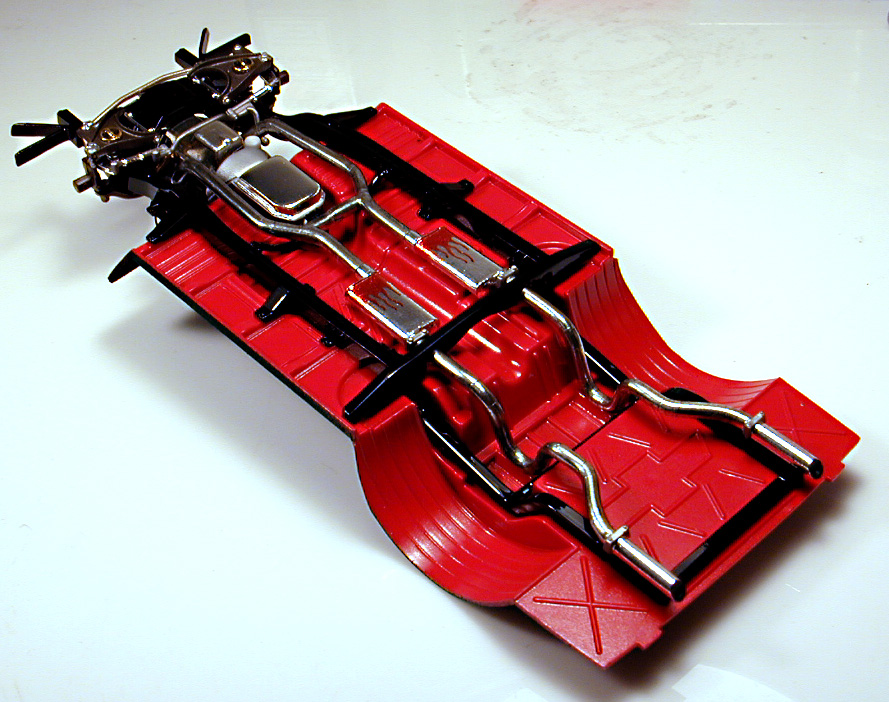
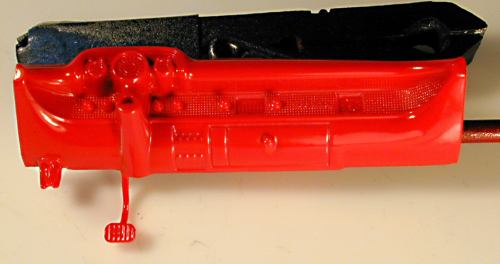
The Exhaust System has been completely covered in Chrome Foil followed by a thinned black wash on the tubes only (except tip) to sorta' get that "stainless" look, then all of the sudden that Evil red Sharpie found it's way into my hand and decided to "heat up" the mufflers! musta' happened in my sleep.
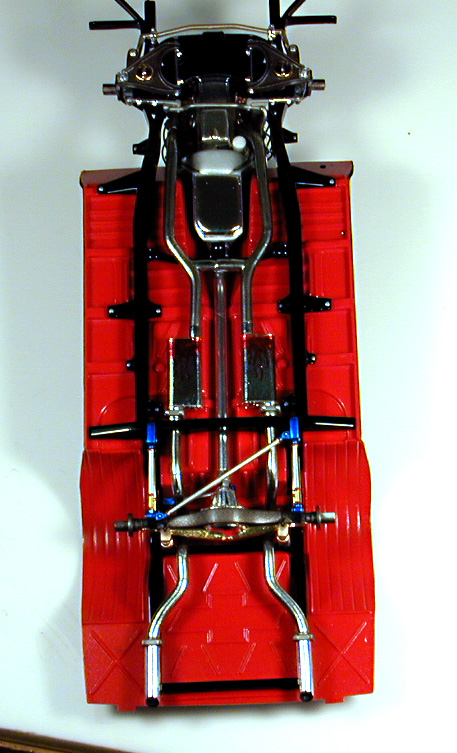
Finally, the Engine, Chassis, Mufflers and Floor Pan all come together...
And we're off to Step 5!
*******************
'57 Chevy Street Machine progress, step 5...........*pics*
Posted By: Christopher Roldan <mailto:chris@stonehillnews.com?subject='57 Chevy Street Machine progress, step 5...........*pics*>
Date: Sunday, 25 November 2001, at 3:06 a.m.
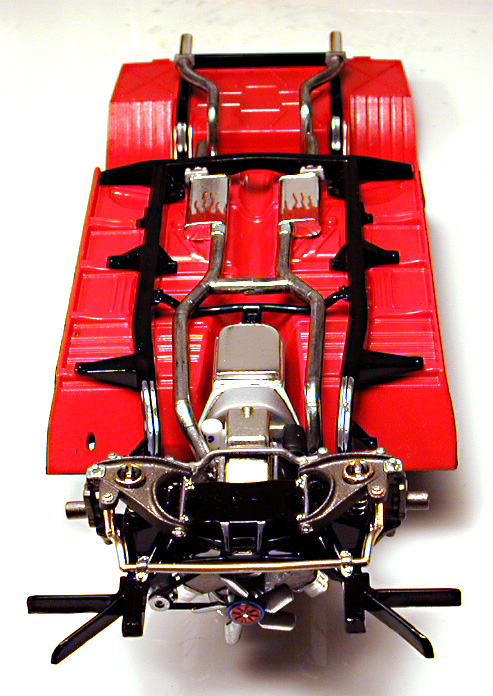
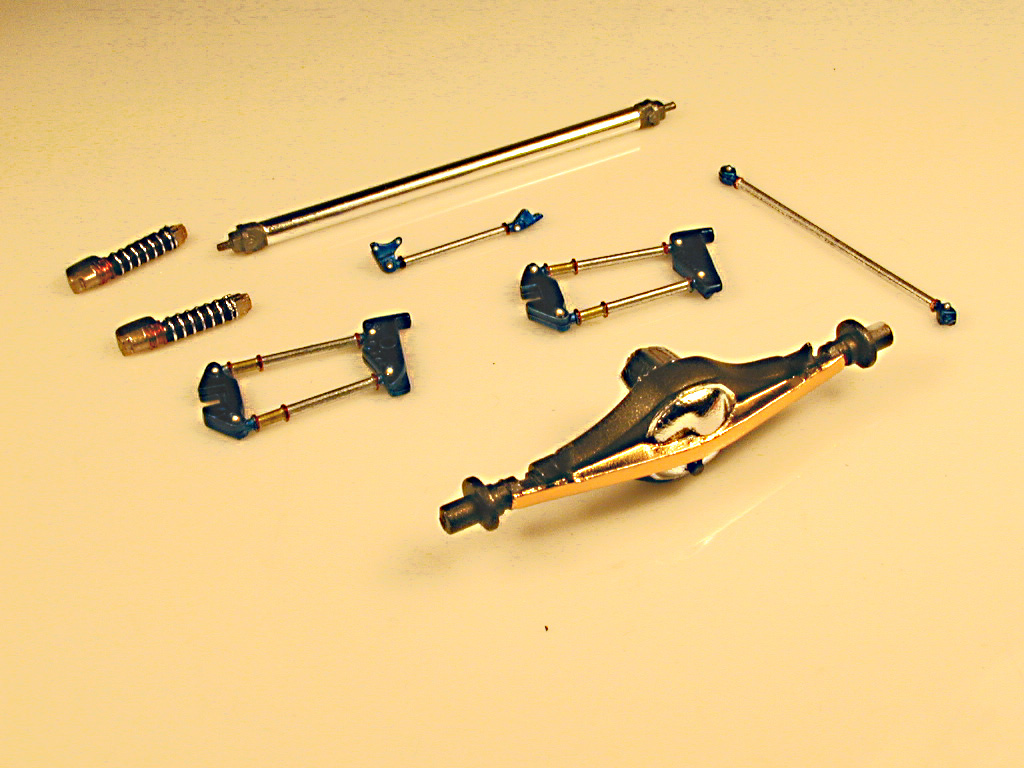
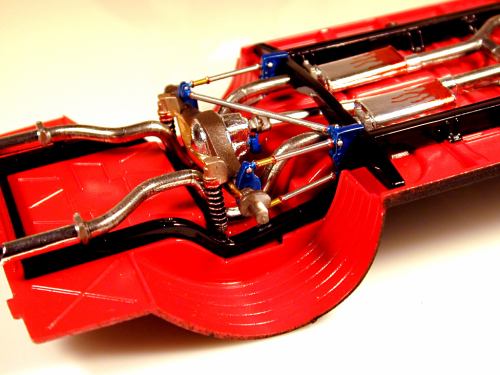
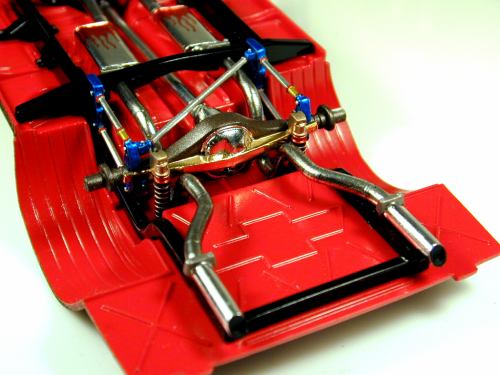
Rear axle got a dose of some Chrome & Gold BMF along with the rear coil-over shocks, driveshaft got Matt Aluminum BMF
Chassis finally completed except for wheels (step 9)
***************************
Posted By: Christopher Roldan <mailto:chris@stonehillnews.com?subject=Re: Can you tell me how you did the blue links?>
Date: Sunday, 25 November 2001, at 5:02 p.m.
In Response To: Can you tell me how you did the blue links? *NM* (The Raven)
absolutely!
Once you remove them from the tree you will:
1.sand off all mold lines (1000 grit paper)
2.spray with your favorite automotive brand Chrome Silver (DO NOT prime) let dry for a couple weeks
3.mask ONLY the ROD Links all the way up to the Bracket (use low tack masking tape)
4.Spray the Brackets Candy Blue (Transparent Blue), about 4 coats oughta' do it or at least till you can't see the silver coming through on the sharp edges of the bracket. do not attempt to spray the blue on there heavy otherwise the color will just "puddle" on the flat surface and won't cover those edges. if it takes more than 4 coats, go for it nice & easy. let dry for a few day's
5.Spray Krylon Matte clear (satin) completely over blue let dry a few hours then spray Krylon Cristyl Clear over same area.
6.Remove Masking tape.
************************
'57 Chevy Street Machine progress, step 6..........*pics*
Posted By: Christopher Roldan <mailto:chris@stonehillnews.com?subject='57 Chevy Street Machine progress, step 6..........*pics*>
Date: Tuesday, 25 December 2001, at 8:55 p.m.
Finally had some time to do one of the things I enjoy...building something.
So with that in hand here are some pics of my latest progress on the '57 Chevy that I'm bored with already but I promised myself I would finish before I start on my next brainstorm of a model project.....you guys know what I mean, right?
I've only been able to knock off the Dash and door panels and if I'm lucky maybe I could complete the Interior by this weekend (fat chance!)
For a smooth finish I first sprayed the top of the Interior door panels...
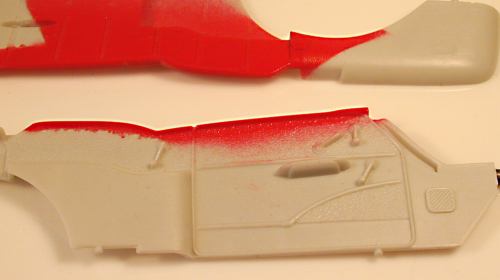
...then brush painted the black and white followed by the foil with painted "wood" knobs.
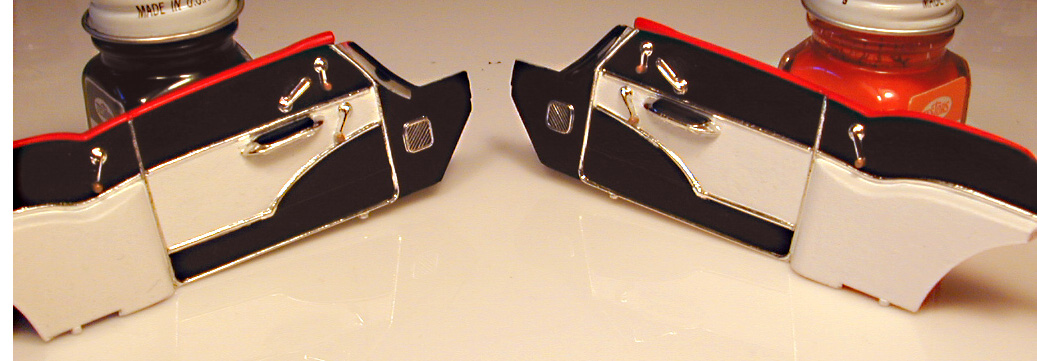
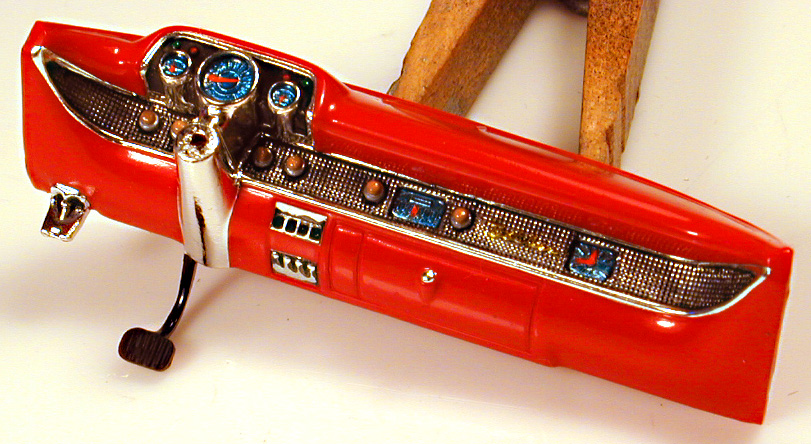
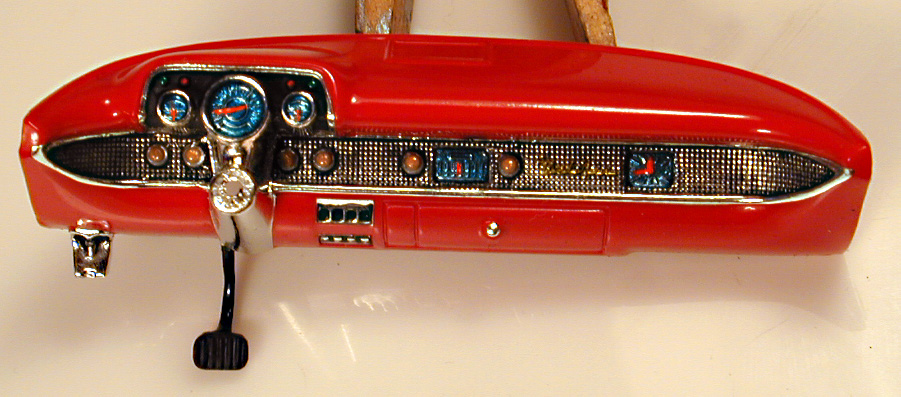
Next came the Dashboard which was also spray painted first....
Then foiled with 19 separate pieces in order to seat properly over the gauges.
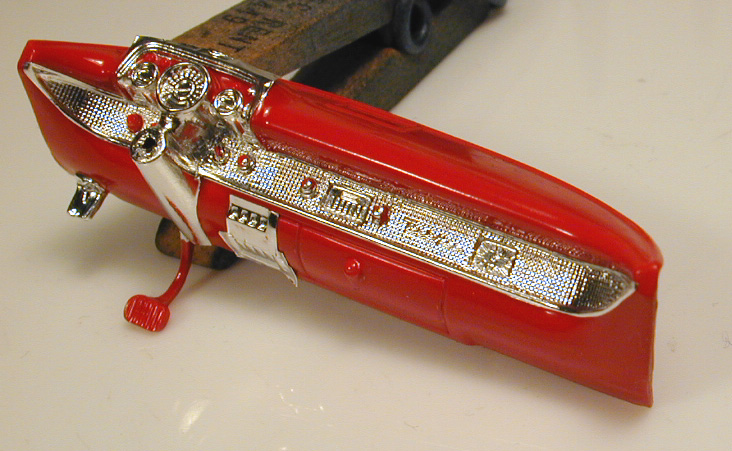
And finally the details were painted!
H.S.P.
**************************
*********************************************
Chris- you called this part 6, but it's either 6b or 7. AF
******************
'57 Chevy Street Machine progress, step 6...........*pics*
Posted By: Christopher Roldan <mailto:chris@stonehillnews.com?subject='57 Chevy Street Machine progress, step 6...........*pics*>
Date: Sunday, 24 February 2002, at 12:54 a.m.
After seen some good stuff here on the board I got a little motivated to work on the '57. six down, five more steps to go!
Seats were spray painted with Krylon flat white for good texture and durability. I masked the "buttons" prior to painting so that when I apply the BMF it will still appear somewhat smooth.
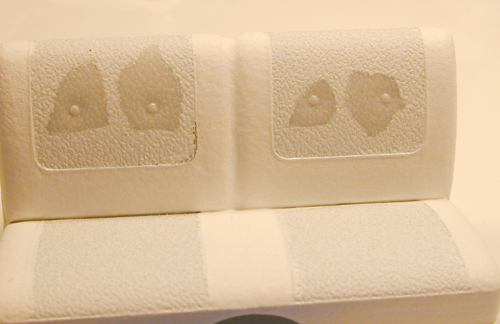
Next I applied the BMF on the buttons before painting the fabric portion of the seat for a couple of reasons. rather than foiling the buttons after the painting and trying to cut that perfect little circle (which is a pain in the booty!) I found that on a application such as this it's better to apply the foil first followed by a thinned out wash of the color you plan to use. this way the color neatly "flows" perfectly (well, almost) to the edges of the foiled detail, plus it also gives the foil a larger surface contact. this method works good on other areas of your builds as well. no more straining the eyeballs!
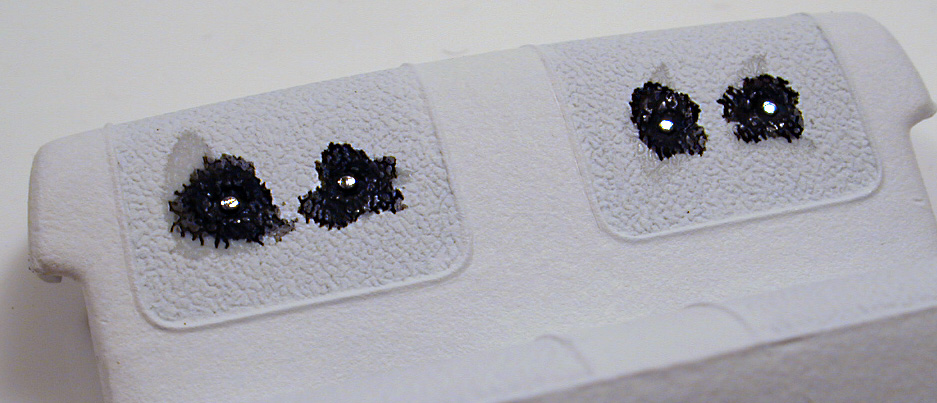
Once you build up enough depth with the thinned out color around the foiled detail (apply a little at a time otherwise the thinned paint will "flood" the detail or seap underneath the foil disolving the adhesive) go ahead and paint the rest of the area with normal paint.
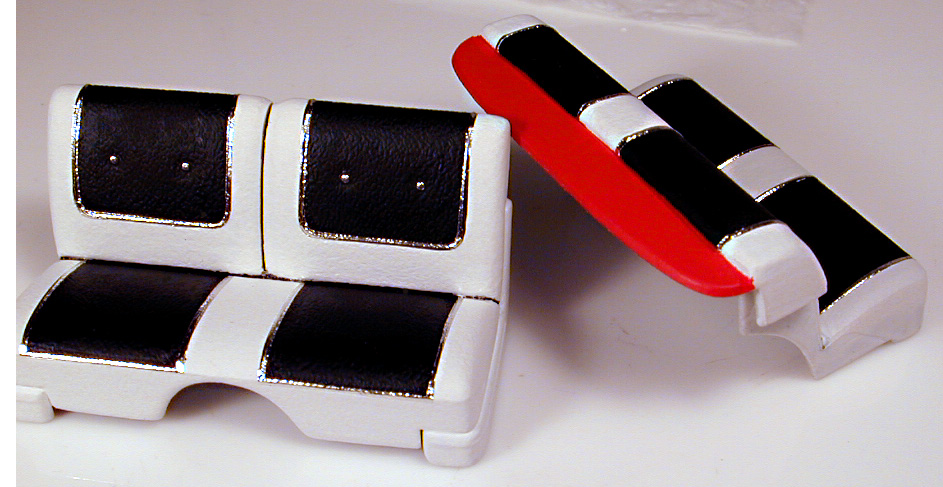
And it finally all comes together.....yipeee!
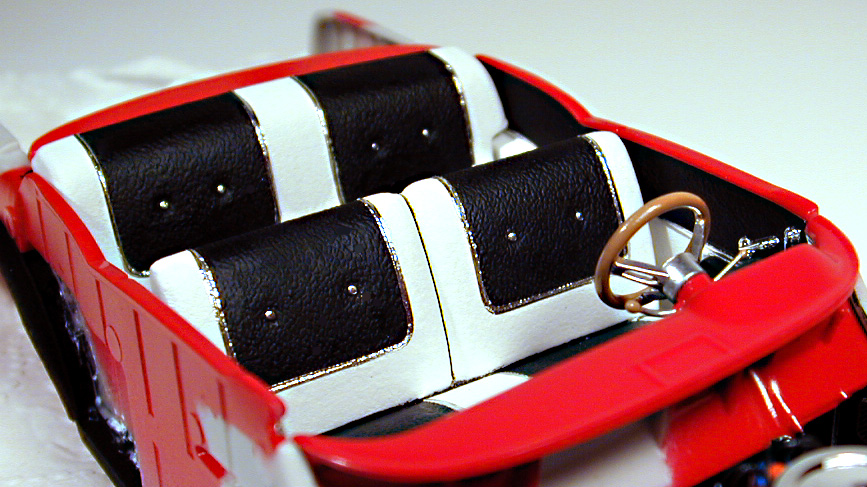
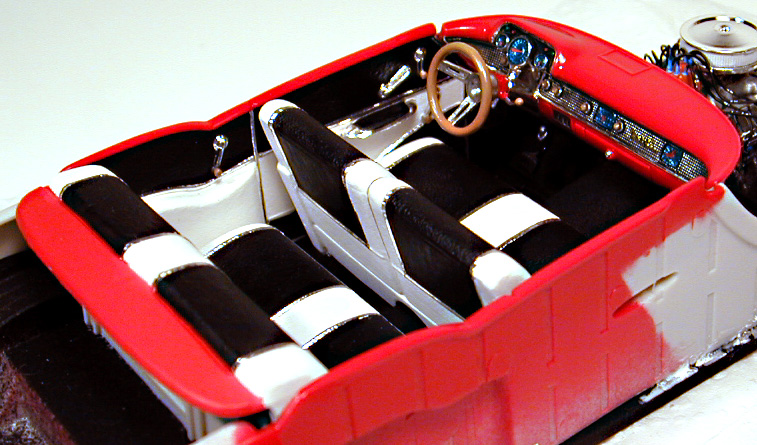
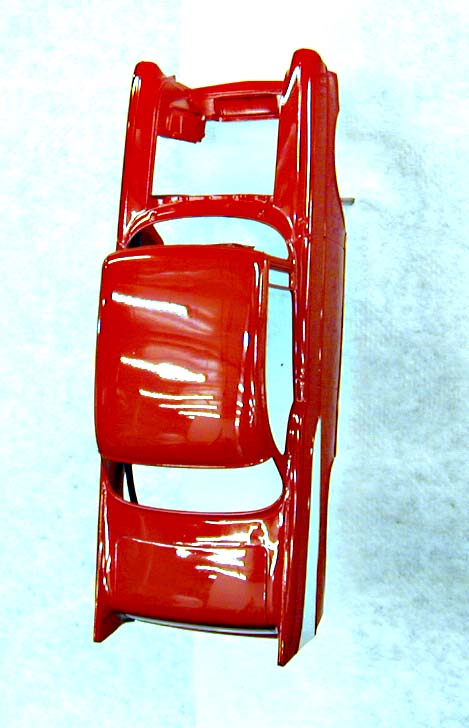
That's it for now my friends. I am BMF'ing the body in preparation for the next step!
- NEW: Collected: C. Roldan's Box Stock [w/foil]57 Chevy Street Machine Pts 1-7 (views: 79) -- Art Fleischmann -- Wednesday, 27 February 2002, at 10:05 a.m.
- NEW: Thanks for putting this together Art. Everytime I study Christopher's stuff, I learn something new! *NM* (views: 1) -- John Piotrowski -- Wednesday, 27 February 2002, at 11:08 a.m.
- NEW: Wow, that's great stuff!! Thanks Art, for putting that together, and thanks Chris, for sharing your techniques!! *NM* (views: 1) -- Klaus Raddatz -- Wednesday, 27 February 2002, at 11:44 a.m.
- NEW: Once again, Chris, you've stunned and impressed the heck out of me!! Man, you're a foil monster! Incredible techniques! Thanks so much for sharing it! n/m (views: 2) -- Bob Kremer -- Wednesday, 27 February 2002, at 12:07 p.m.
View Thread | Post Response | Return to Index | Read Prev Msg | Read Next Msg Model Message Board is maintained by Tom Carter with WebBBS 4.33.